
Please carefully review these user instructions before using. BurtonBands is a revolutionary restorative product that, when used properly, will greatly enhance operator efficiency and outcomes. These products are very different from what is currently available, so please take time to understand how they work.
Cleaning and Sterilization:
BurtonBands matrices and wedges are intended to be single-use products. Do not sterilize for reuse.
User Instructions:
- Apply a rubber dam – Patient safety is always a priority. BurtonBands recommends use of a rubber dam for all restorative procedures. If a rubber dam is not used, it is recommended that the operator secure the wedges with a piece of floss to reduce the risk of accidental ingestion or aspiration.
- Prepare the cavity – Complete the cavity preparation as usual using a pre-wedge and guard to protect the adjacent tooth if necessary. Pre-wedging is recommended.
- Insert the matrix - Carefully place the sectional or circumferential matrix of choice into the area to be restored.
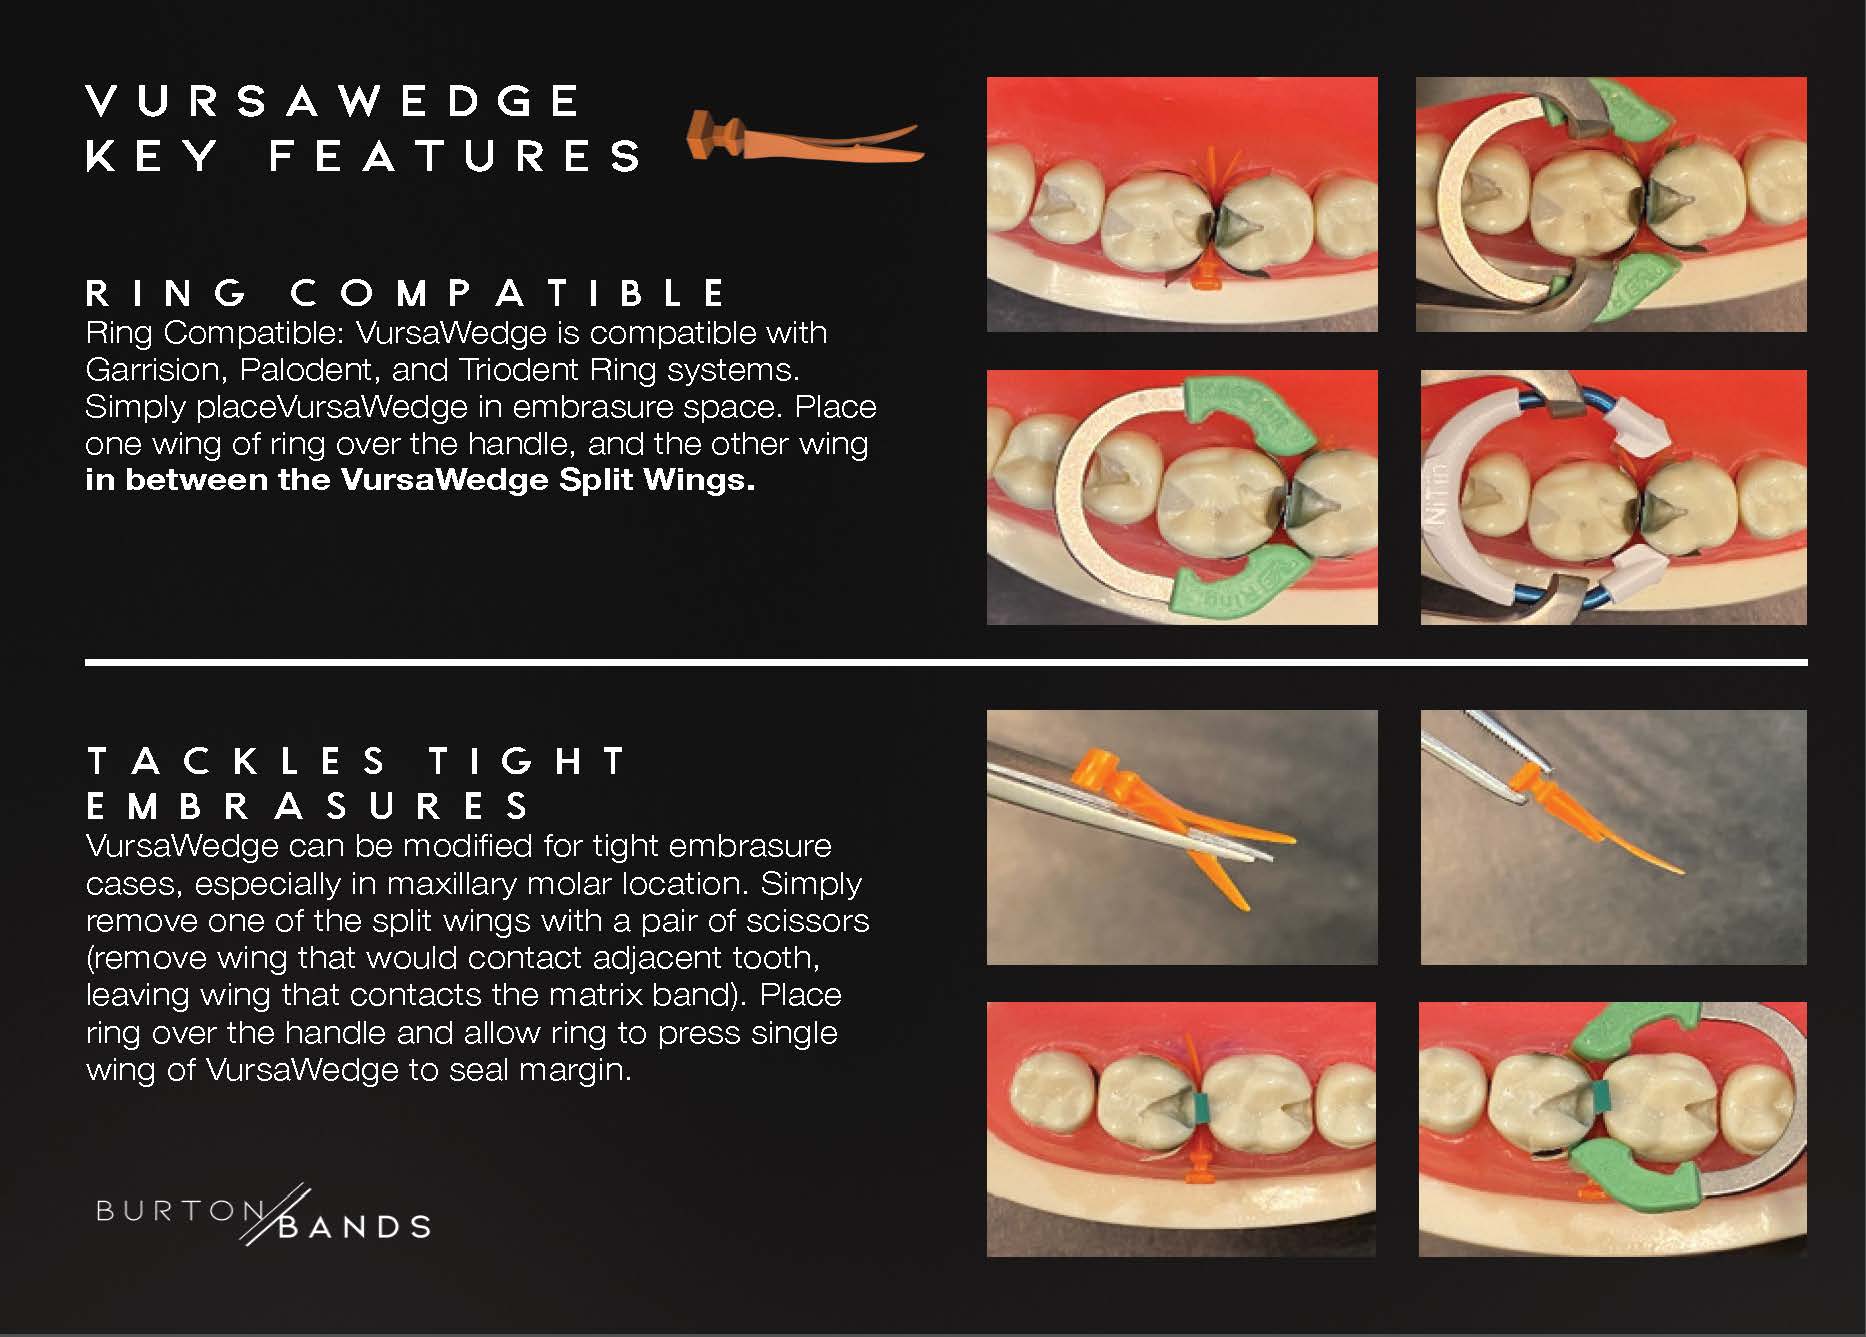
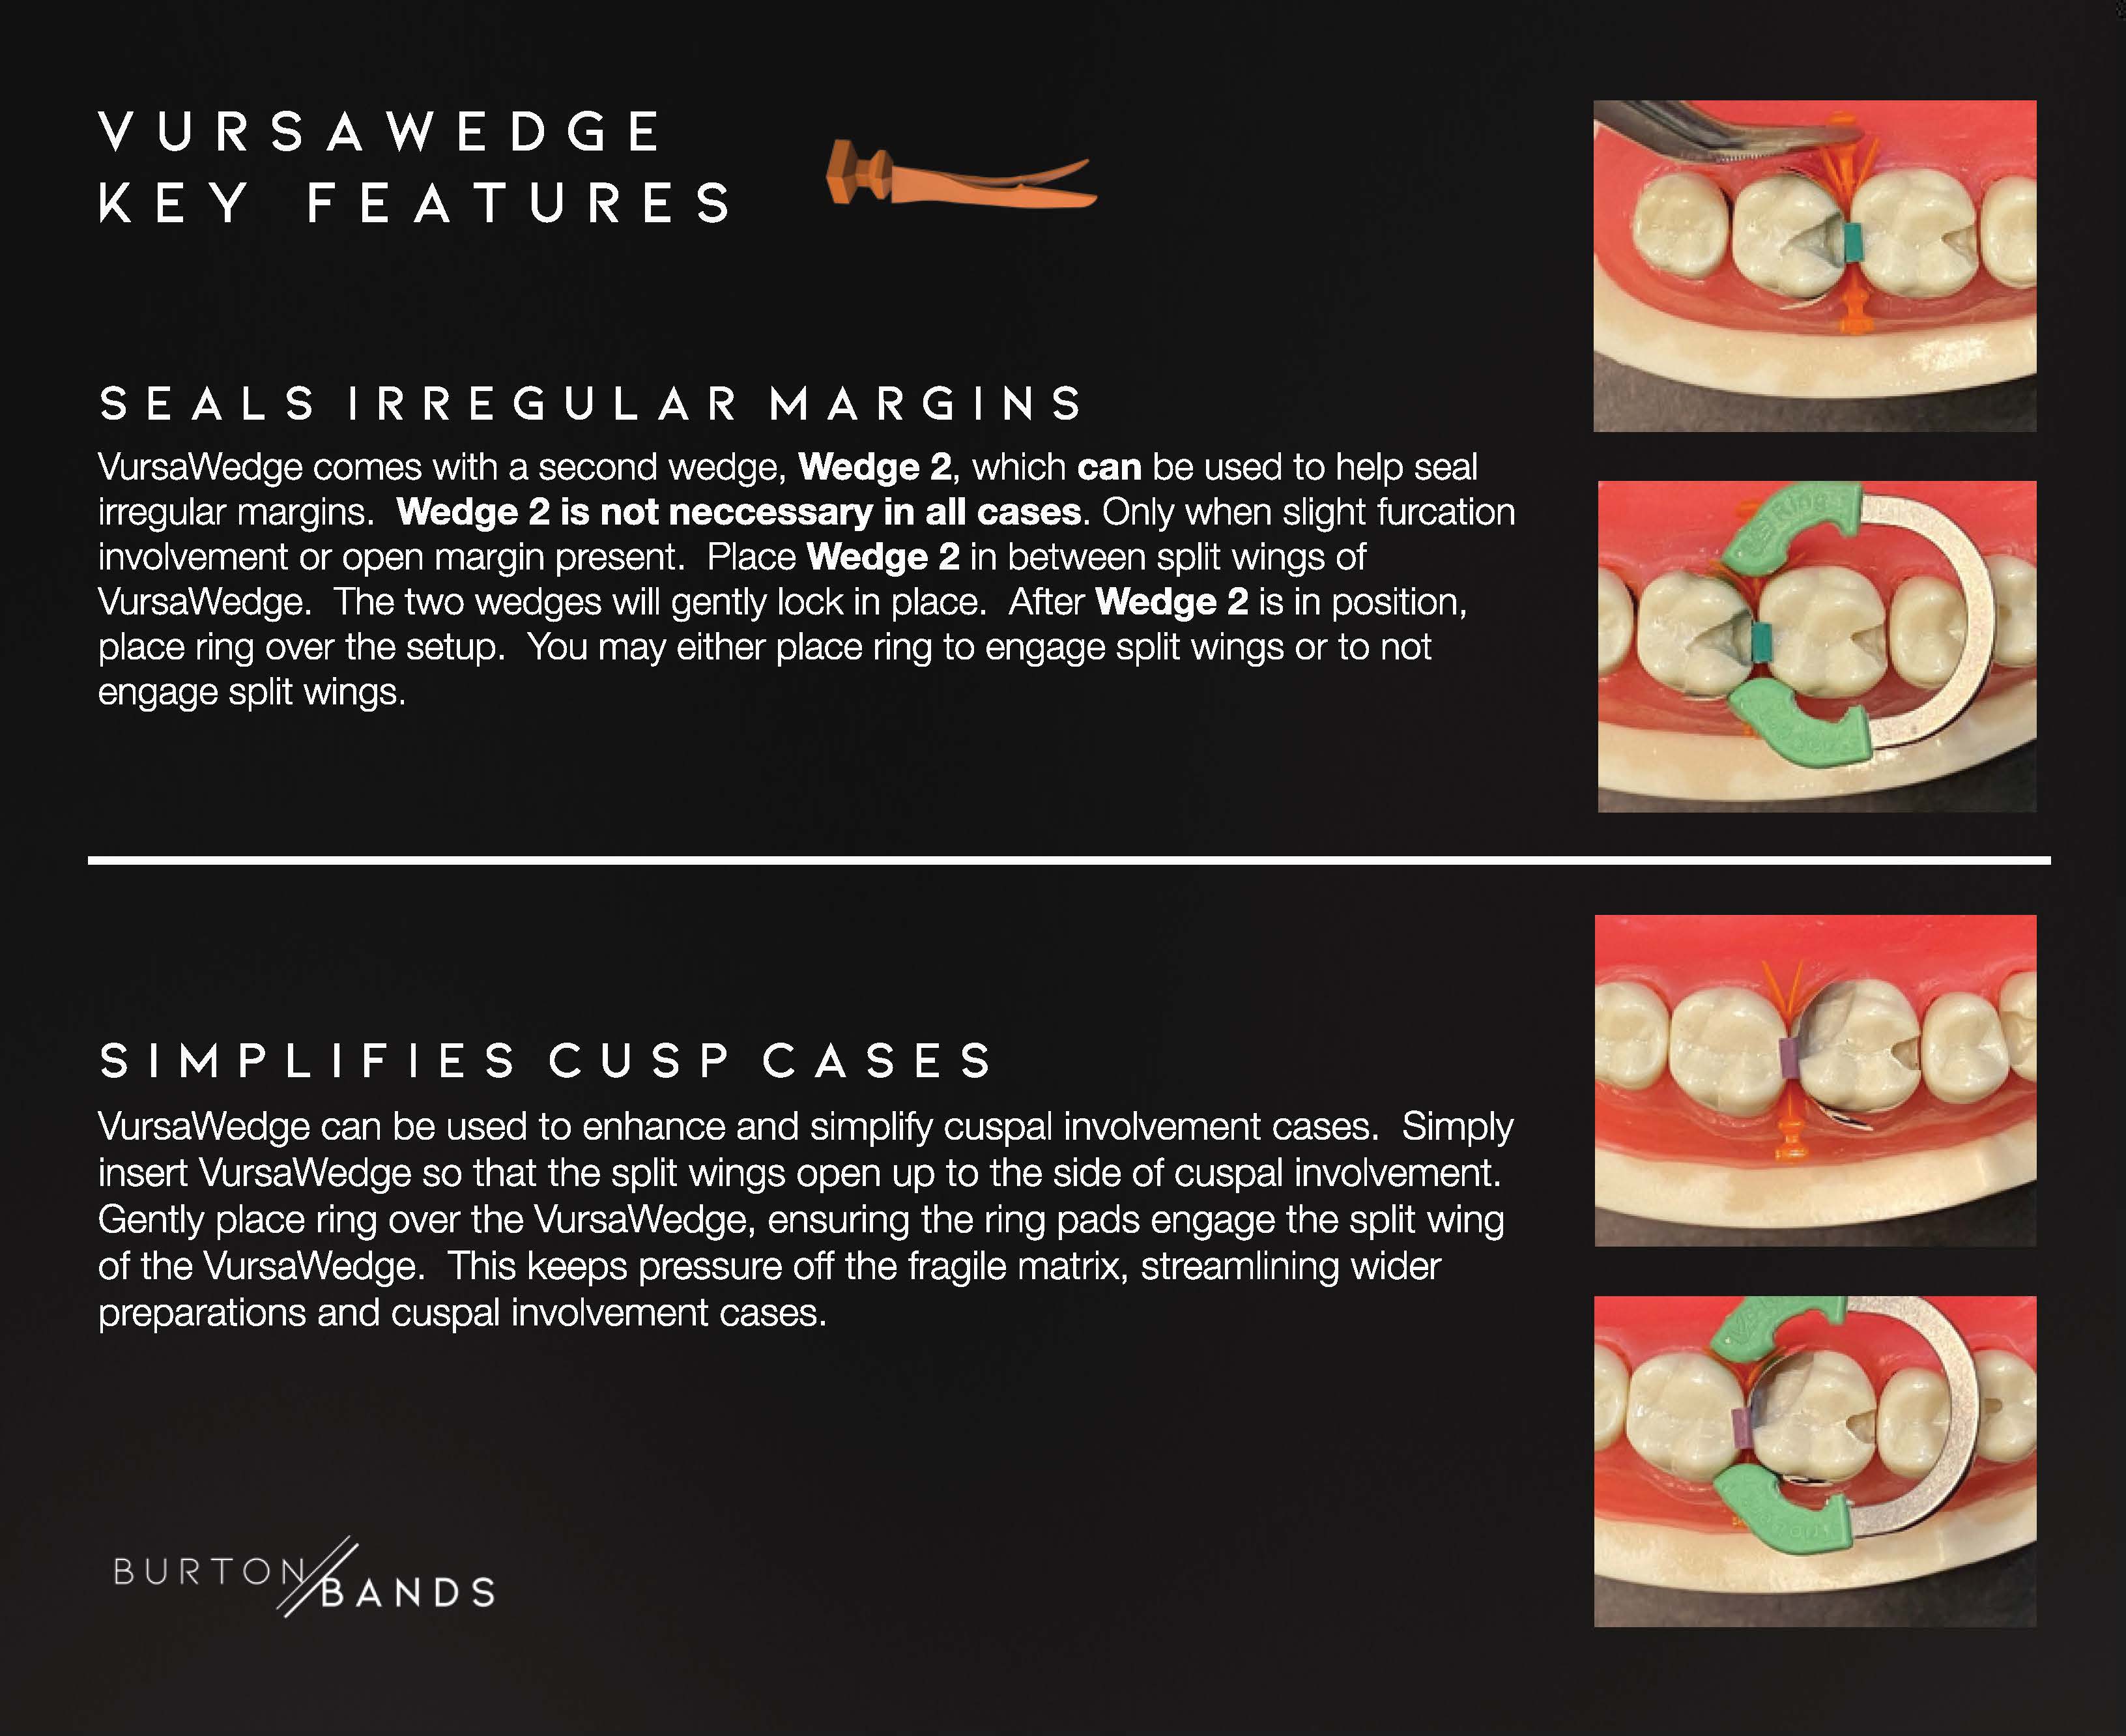
- Insert the VursaWedge – Place the VursaWedge into the gingival embrasure space so that the split wings open up with the shape of the embrasure space opening.
- Secure the wedge and matrix – At this point, you may restore as is. If the gingival margin is open, you can either place a Wedge2 in between the splits of the VursaWedge or place a ring over the VursaWedge.
- Fill the cavitation - Fill cavitation using your preferred etching, bonding, composite and curing products.
- Remove the matrix - Remove ring or Wedge2 (if using), then remove the VursaWedge and your sectional matrix.
- Complete the restoration - Discard the VursaWedge and Wedge2 and shape and polish as needed.
Watch Dr. Burton's video demonstrations for more information.
